Simple Kombucha
I was nervous to try making my own kombucha because I was worried it would be another time-consuming process to add to my routine.
But I can honestly say that it is one of the easiest fermenting processes you can learn. So, if you’re looking for and easy entry into the world of fermentation this simple kombucha process is for you!
What is Kombucha?
Simply put Kombucha is a fermented tea that originated in China. There are so many different fermented things from every part of the world.
I love learning about the different foods from different countries. I don’t know about you, but we love to eat. 🙂 One of the things I like best about living in the time and place that we do, is that we can so easily learn and enjoy the different foods from all over the world!
People started fermenting things to help preserve them. Not only does the fermenting process help things last longer without refrigeration, but we now know it is also very good for encouraging healthy gut bacteria that can help aid in digestion.
Unfortunately, there are so many who struggle with proper digestion these days. I can’t help but think that part of that is from the invention of refrigerators. With over processed foods and a move away from naturally preserved foods our guts are a mess.
Kombucha for a Healthy Gut
I have been learning over the past several years about the benefits of fermented foods such as kombucha, sourdough, sauerkraut and more. It has been a goal of mine to move away from the prepackaged junk at the grocery stores and make our food from scratch. Getting back to a more natural way of living.
I’ve heard of the benefits of adding kombucha to help the healthy gut bacteria in our stomachs thrive. But after learning sourdough a few years ago, I was worried I wouldn’t be able to handle another fermented process.
My friends encouraged me and reassured me that if I could handle sourdough then kombucha would be a breeze. And they were right.
The Simple Process
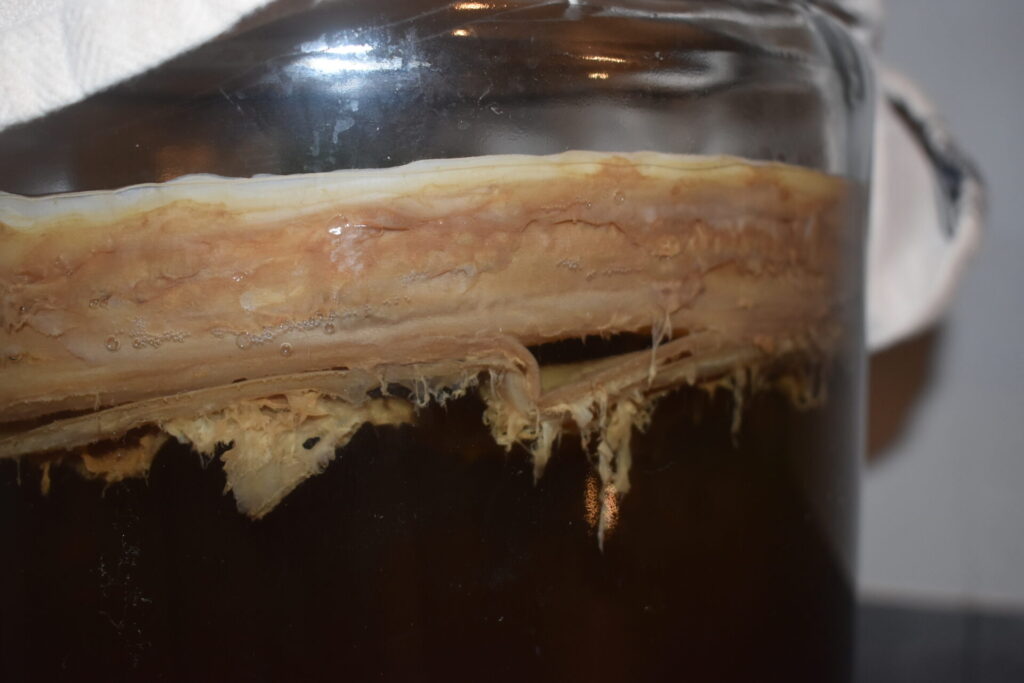
I was able to get a scoby from my friend who had already started her kombucha.
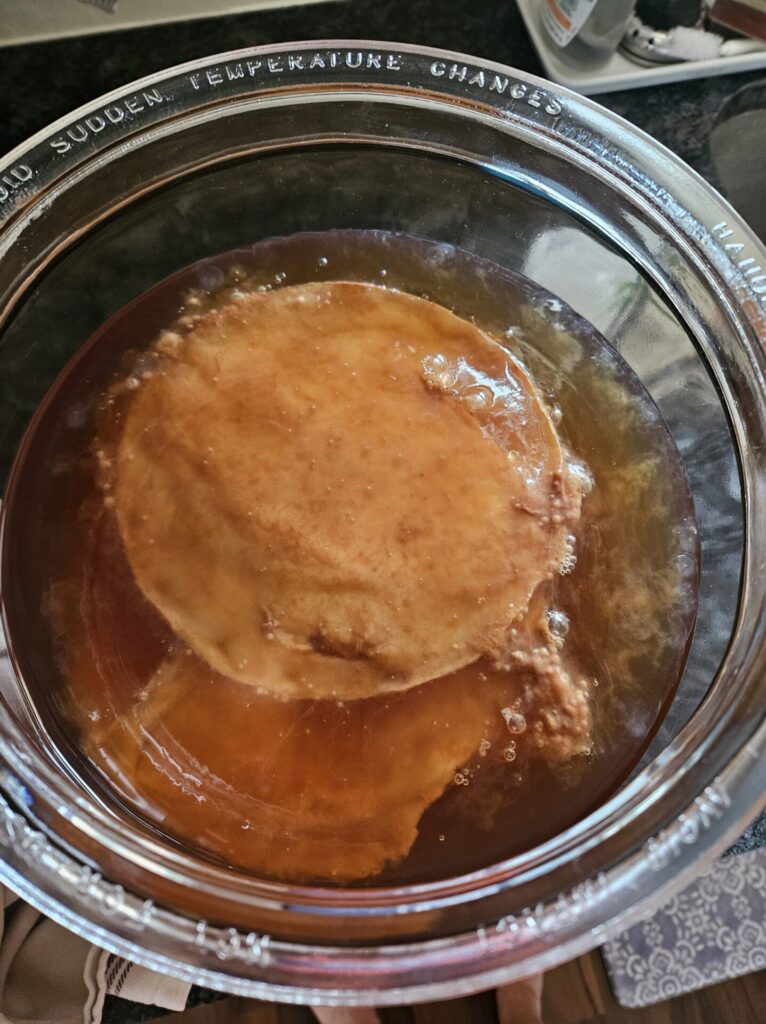
Thankfully my mom had also made kombucha for years, so she was able to walk me through what to do.
Once you have a scoby and few cups of an already fermented batch of kombucha all you have to do is brew some regular black tea. I will learn how to start my own scoby later and share that with you too. But for now, hopefully you can find a friend who can give you a scoby to get you started.

I like to brew two-gallon batches at a time because we go through a lot of kombucha in a week. But you can always adjust your amounts based on what your family needs.
For every gallon of tea you brew, you need to add 1 cup of sugar. The good bacteria needs the sugar to eat and stay healthy.
I like to boil a pot of water and stick three tea bags in for 10 minutes. Then I strain out the tea bags and mix in the sugar while it’s still hot, so the sugar dissolves more easily.
I pour this into a gallon pitcher and add enough water to equal a gallon then let it cool. You want it room temp before adding it to the scoby, so you don’t scald the bacteria.
It’s important to keep a towel over you kombucha so little flies don’t get in it and spoil it. Because the flies like the smell of the fermentation they are drawn right to it.
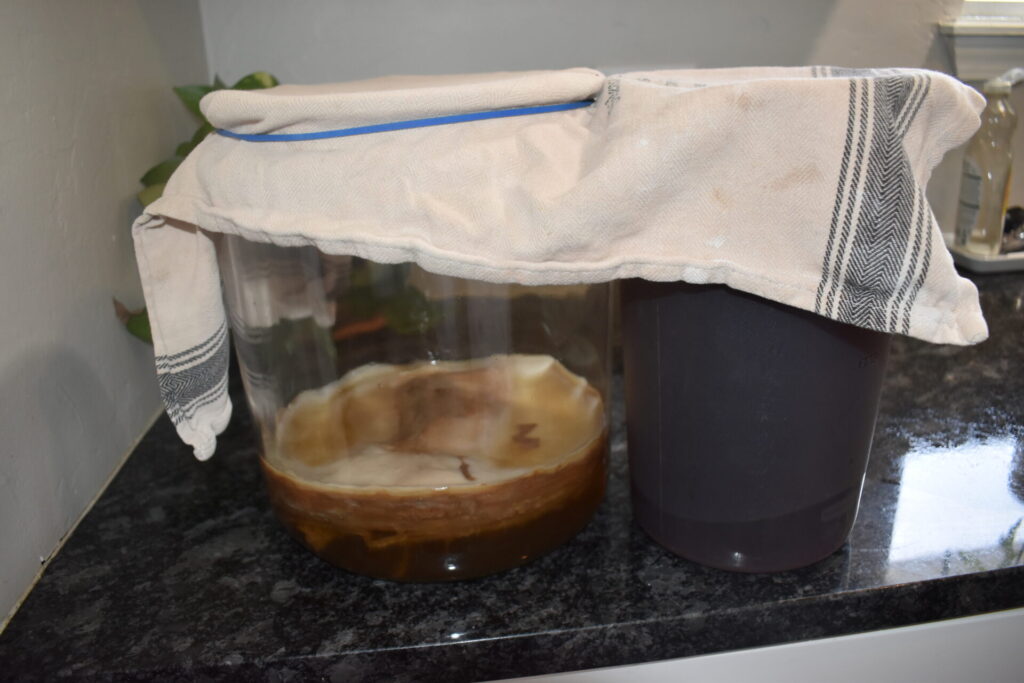
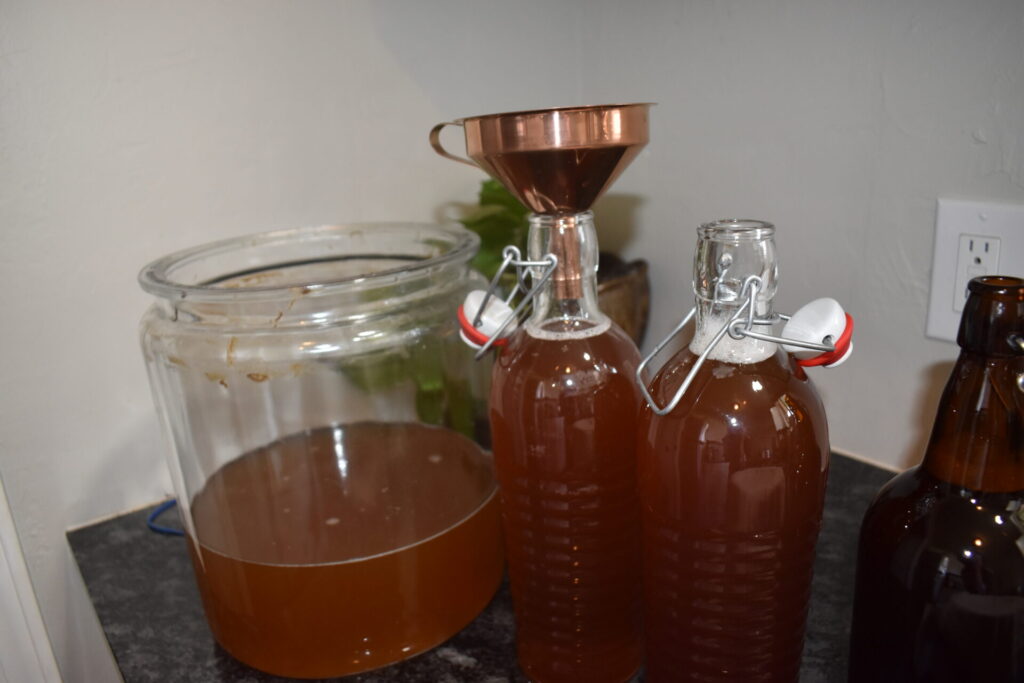
While the new tea is cooling, I work on filling my jars. Then after it’s fully cooled, I pour this gallon plus one more gallon of water in with the scoby. I try to be sure I keep some of the previous batch to help jump start the next one.
I’ve also heard it’s important to use filtered water. If you live in the city especially. The chemicals they use to clean the water of bacteria will, you guessed it, also kill your healthy good bacteria that you need to ferment the tea.
Many Kombucha Flavor Options
Basically, the kombucha needs to go through the initial fermentation which takes about a week. Maybe a bit longer depending on time of year and temperatures and how sour you want it. Then once it’s ready you add any flavoring you want and let it sit a few more days to “carbonate”.
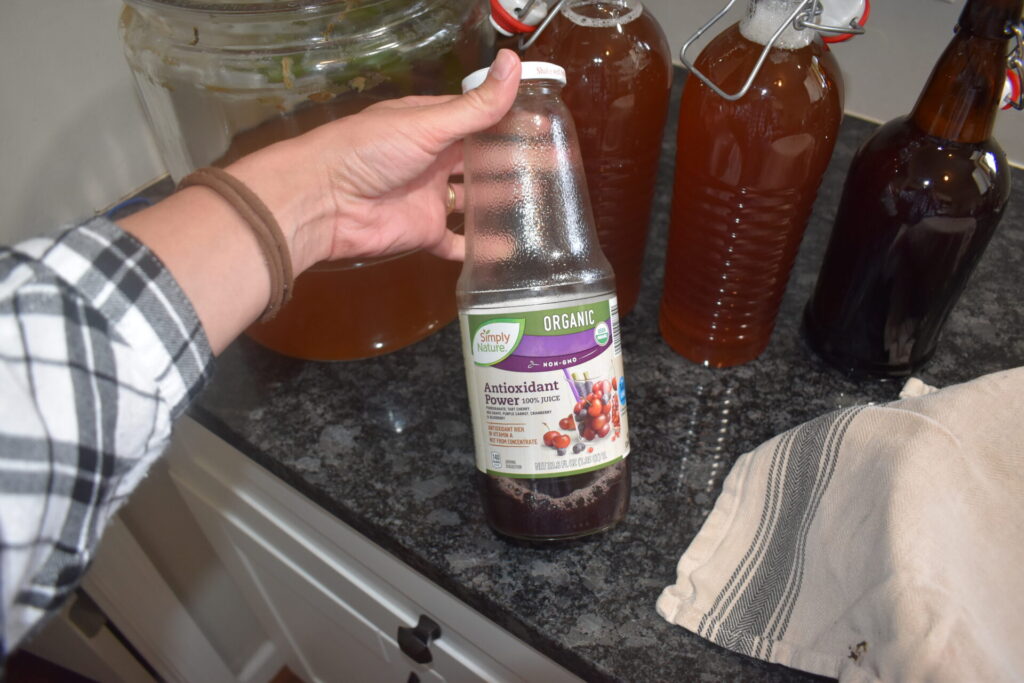
The second ferment is when you can add any flavors you want. We like to just add fruit juice and a little honey. You just want to make sure there’s enough sugar in whatever you add to give the bacteria enough to eat and make it bubbly.
Lots of people like to add real fruit and come up with all kinds of delicious flavors. You can get really creative at this point and really make it your own and tailor it to whatever suits your family best.
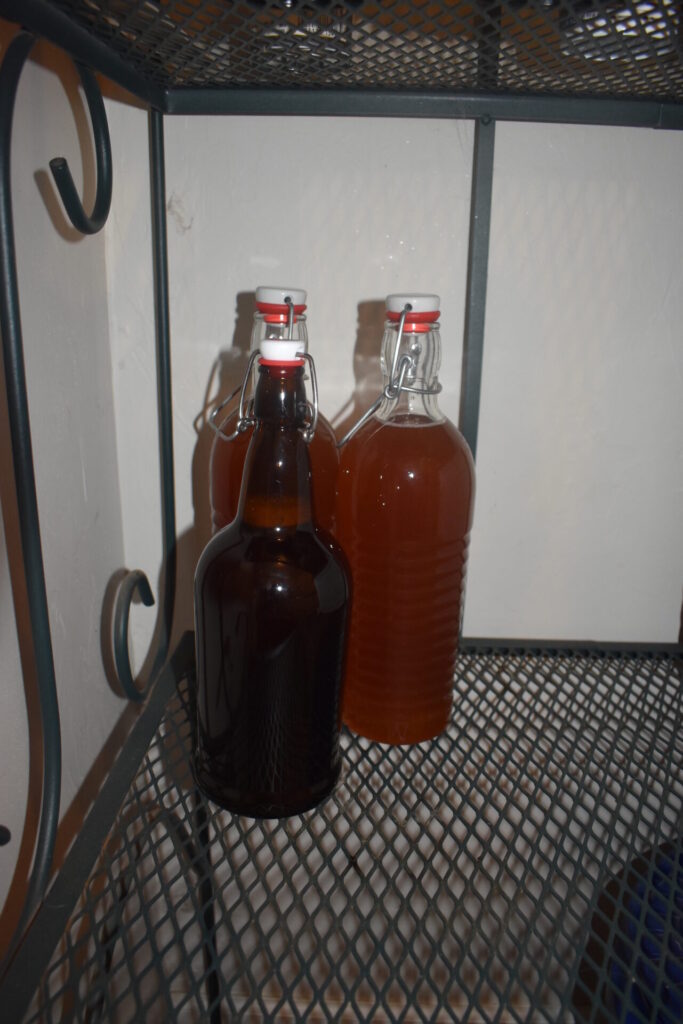
Once you’ve got it all in the jars, they need 2 to 4 days at room temperature. I like to move them to the fridge after this second ferment time, so they don’t over carbonate.
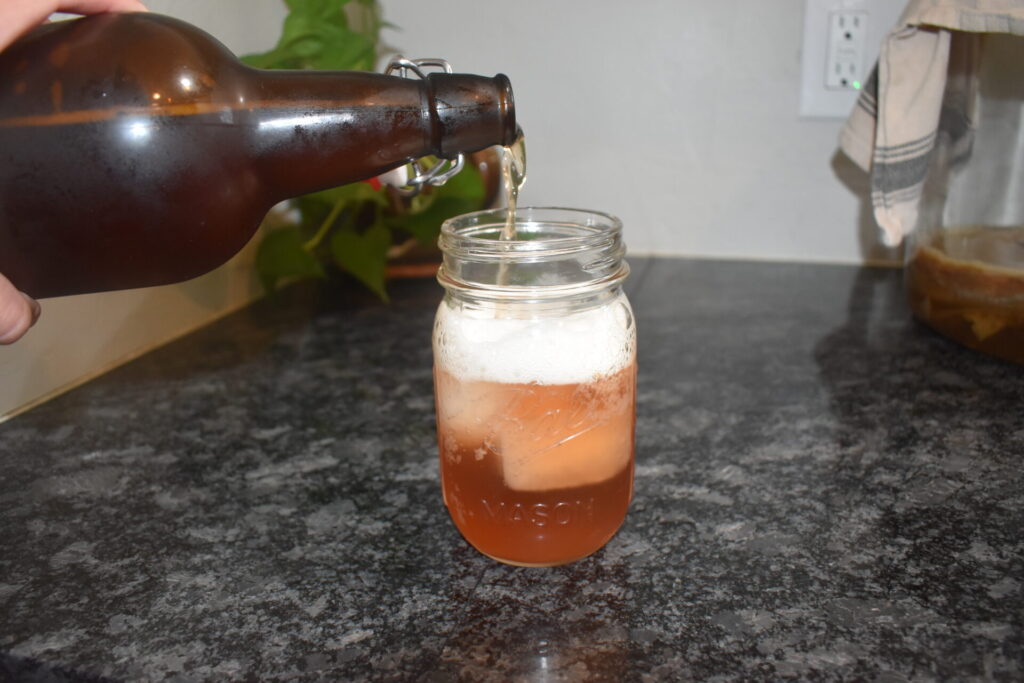
These flip top bottles really are the best for this process. I tried it with just a mason jar, but the lid did not hold tight enough to really lock in the carbonation. Every time I tried it in the mason jars it would not get bubbly and was also way too sour. I don’t why this made a difference, but it did. So, I do recommend collecting a bunch of these flip top bottles.
Then it’s time to enjoy!
I hope this post helps ease your mind about trying your own kombucha. Once you get in the rhythm, it really is the easiest thing I’ve learned so far.